Winter Soil Revival: Composting with Leaves, Manure, and Kitchen Scraps
Winter may seem like a time when your garden or pasture takes a break — the soil frozen, the air still, and the compost pile dormant under a blanket of frost. But beneath that quiet surface lies a golden opportunity for soil revival. Cold-season composting, done right, can transform your winter waste — fallen leaves, barn manure, and everyday kitchen scraps — into rich, life-giving soil that’s ready to fuel spring growth.
This isn’t just about waste reduction; it’s about regeneration — building the foundation of a healthier, more self-sustaining homestead ecosystem.
Why Composting in Winter Works
Many believe composting halts during winter because microbial activity slows in the cold. While it’s true that decomposition takes longer, it doesn’t stop entirely. Microbes continue to work — just at a slower pace — and the internal heat of a well-built compost pile can maintain a surprisingly warm core, even when outside temperatures dip below freezing.
Winter composting ensures:
- Continuous waste recycling — no need to pause your eco-routine.
- A nutrient head start — by early spring, your compost is half-ready and full of microbial life.
- Soil insulation and structure improvement once applied before planting season.
The secret lies in using the right materials — and managing them properly.
1. Leaves: Nature’s Perfect Carbon Source
Fallen leaves are one of the most underrated soil-building materials. High in carbon and minerals, they balance nitrogen-heavy manure and food scraps.
- Shred before use: Whole leaves can mat down, blocking air and slowing decomposition. Running them through a mower or shredder creates ideal particle size.
- Mix evenly: Combine 3 parts shredded leaves with 1 part nitrogen material (like manure or kitchen waste).
- Use as insulation: A thick layer of dry leaves on top of your compost pile keeps the heat in and prevents freezing.
Bonus tip: Bag extra leaves in fall and store them dry — they’ll be your “brown gold” all winter long.
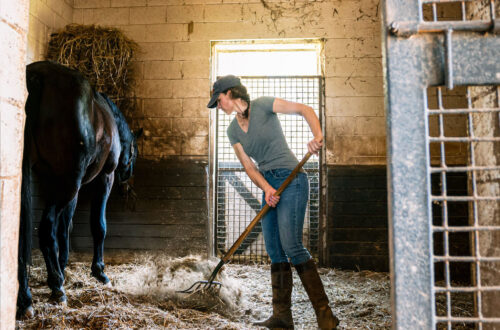
2. Manure: The Powerhouse of Winter Composting
Livestock manure adds the nitrogen and microbes needed to fire up the composting process. In winter, when barns are active and animals are confined more often, manure is abundant — the perfect resource to mix into your compost.
- Best sources: Cow, horse, goat, sheep, and poultry manure (avoid dog or cat waste due to pathogens).
- Mix with bedding: Straw or wood shavings in manure help regulate moisture and carbon balance.
- Pile smart: Create a heap at least 3x3x3 feet — large enough to retain microbial heat in the center.
If your pile’s interior temperature stays above 110°F, microbial activity continues steadily, even during the coldest weeks.
3. Kitchen Scraps: Everyday Nutrient Boosters
Kitchen waste provides quick nitrogen and moisture — essential ingredients for microbial growth.
Add vegetable peels, fruit cores, coffee grounds, eggshells, and tea leaves. Avoid meat, dairy, and oily foods since they attract pests and slow decomposition.
To make winter composting easier:
- Pre-freeze scraps: Store them in sealed containers or freezer bags, then add in batches to the compost.
- Layer, don’t dump: Alternate layers of scraps, manure, and leaves to maintain air flow.
- Cover immediately: Use a leaf or straw layer after every addition to trap heat and control odor.
4. Building a Winter-Proof Compost Pile
Winter composting thrives on structure and insulation.
Follow this proven method for success:
- Choose the right spot: A sunny, wind-sheltered area accelerates microbial activity.
- Start with coarse material: Twigs or corn stalks at the base improve drainage and air circulation.
- Alternate layers: Stack “greens” (manure, scraps) with “browns” (leaves, straw) in 4–6 inch layers.
- Moisture check: The pile should be damp, not soggy. Add water or dry leaves to adjust.
- Insulate: Cap with 6–8 inches of leaves, straw, or finished compost to lock in heat.
By mid-winter, you may notice steam rising from the center — a sure sign your microbes are still at work.
5. Cold Composting vs. Hot Composting
In winter, “hot composting” slows but doesn’t disappear. The core of the pile can stay active if managed properly, while the outer layers compost more slowly — this is known as cold composting.
While it takes longer (up to 5–6 months), the benefit is less maintenance and better nutrient retention.
Come spring, you’ll find dark, partially decomposed compost ready to finish curing just in time for garden prep.
6. How to Use Winter Compost in Spring
When the thaw arrives, your compost will be rich and crumbly, ready to feed your soil. Here’s how to apply it effectively:
- For gardens: Spread 1–2 inches over planting beds and till lightly into the top few inches.
- For pastures: Apply evenly before rain or light irrigation to help nutrients penetrate.
- For trees and shrubs: Use as mulch around the base to boost moisture retention and root health.
The result? Healthier soil, stronger plants, and a thriving microbial community that continues the natural nutrient cycle.
7. A Sustainable Cycle Worth Keeping
Composting through winter isn’t just about convenience — it’s a long-term investment in soil vitality. By turning everyday waste into nutrient-rich humus, you close the loop between your home, animals, and land.
What was once “trash” becomes next season’s treasure: richer soil, healthier pastures, and more resilient plants. And when spring arrives, you’ll have more than just compost — you’ll have the satisfaction of knowing your homestead stayed productive even in the depths of winter.


You May Also Like

Low-Stress Moves: Handling Livestock Safely in Frozen Pastures

How to Prevent Pasture Burnout During Peak Summer Heat Stress